Onboarding
- 16 Nov 2022
- 3 Minutes to read
- Contributors


- Print
- DarkLight
Onboarding
- Updated on 16 Nov 2022
- 3 Minutes to read
- Contributors
- Print
- DarkLight
Article summary
Did you find this summary helpful?
Thank you for your feedback!
In order to be able to scan a cloud account and find its vulnerabilities out, it has to be added to a Cloud Sentry. The way to create a Cloud Sentry that has acess to the account to be analized, is by adding a credential with the rights permissions for this account.
- In the Sentries page, click Create Sentry.

- In the Sentry Creation Wizard, add a name to the new Sentry, then select Cloud Sentry radio button, and then select the appropiate cloud provider for the account to be configured
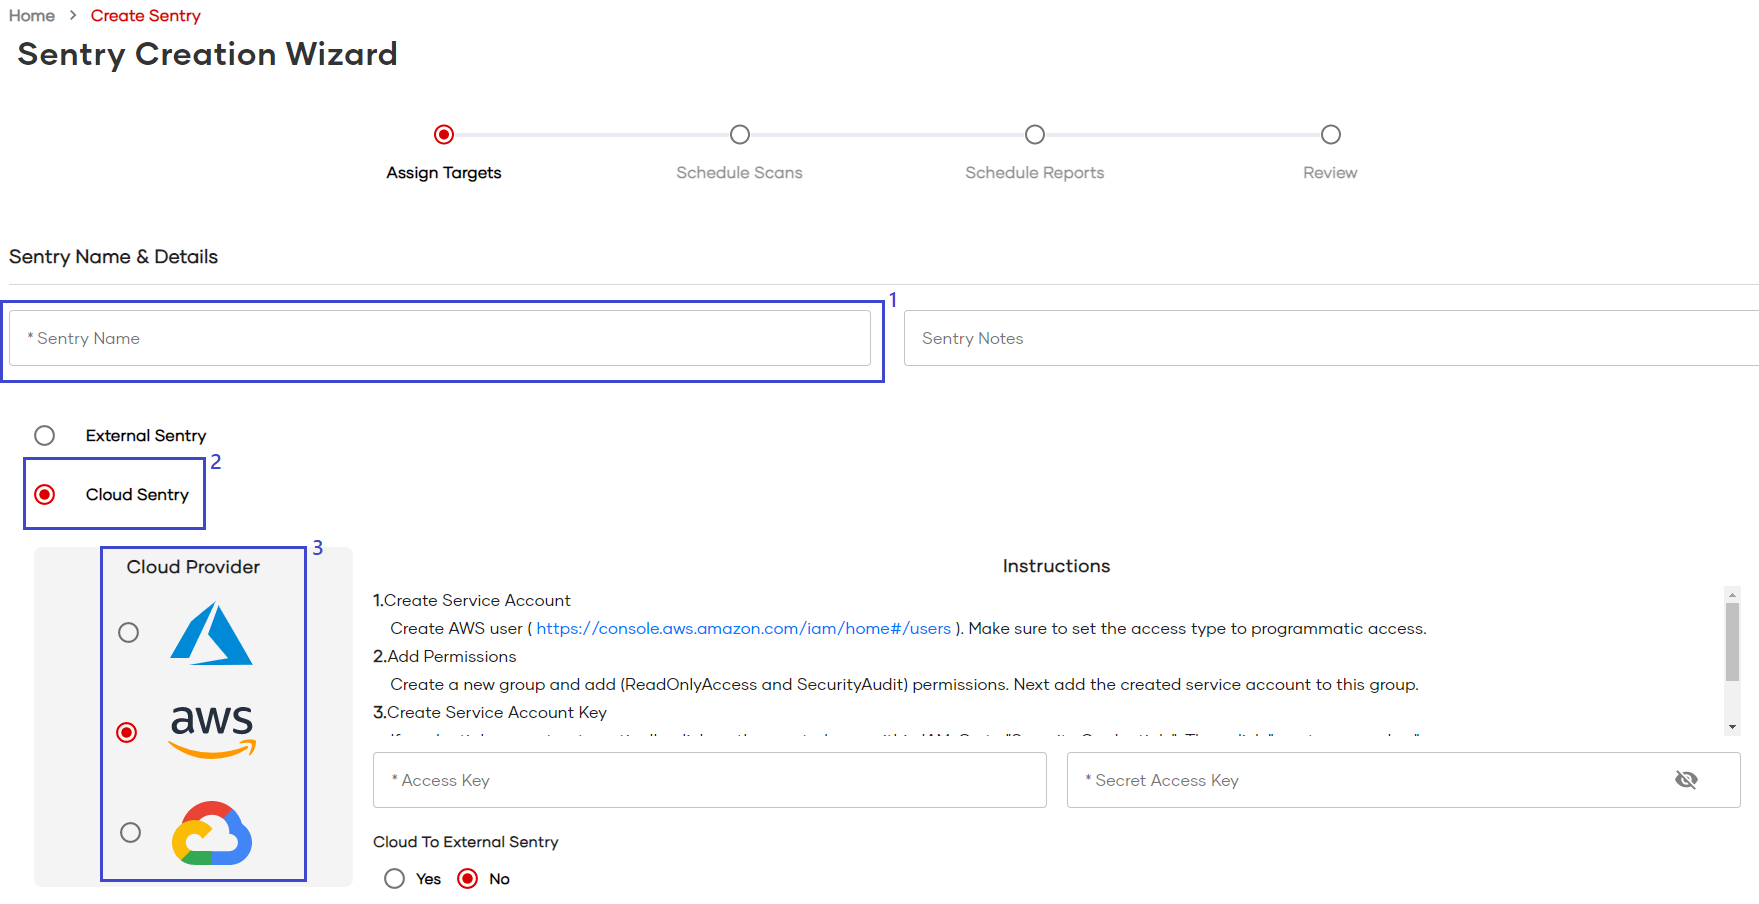
- Each provider has their own set of instructions for generating the credential. Find here below all of them.
- Azure
- For step by step, please review: Azure Detailed Steps for User Credential Generation
- App Registration
- In Azure Active Directory. Create a single tenant App registration, with a secret (https://docs.microsoft.com/en-us/azure/active-directory/develop/howto-create-service-principal-portal)
- Add Permissions
- In API Permission option, Give permissions Directory Read All, and Application Read All. Once added, click Grant Admin consent for Default Directory.
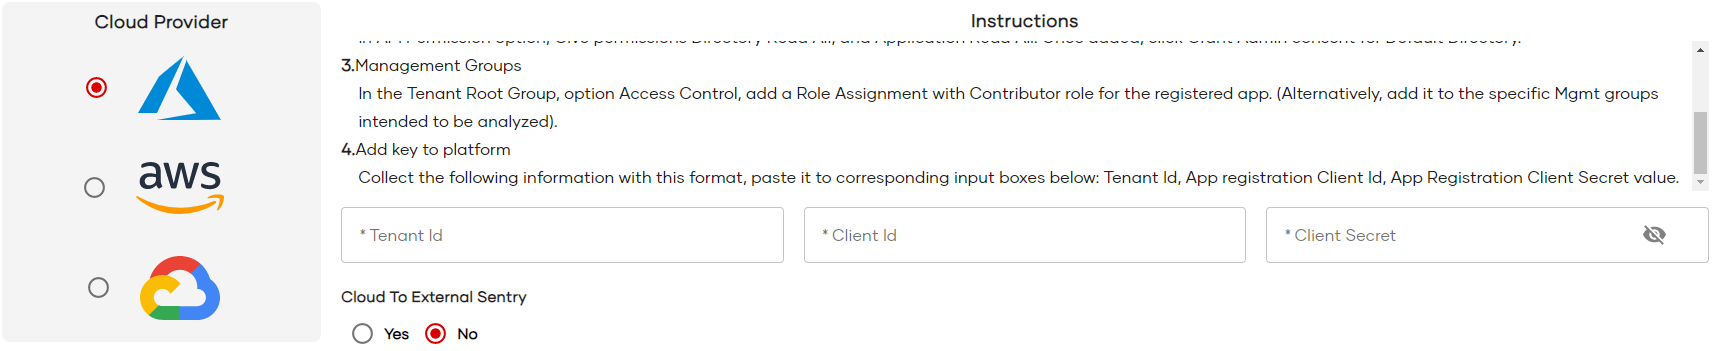
- Management Groups
- In the Tenant Root Group, option Access Control, add a Role Assignment with Contributor role for the registered app. (Alternatively, add it to the specific Mgmt groups intended to be analyzed).
- Create App Registration Secret
- Go to Active Directory -> App Registration and select the newly created App Registration. In the left side menu select Certificates and Secrets and create a new Secret, and save the value for the Red Sentry Cloud configuration.
- From the Overview of the App Registration get the Client Id and the Tenant Id and save them for the Red Sentry Cloud configuration
- Add key to platform
- Collect the following information with this format, paste it to corresponding input boxes below: Tenant Id, App registration Client Id, App Registration Client Secret value.
- Collect the following information with this format, paste it to corresponding input boxes below: Tenant Id, App registration Client Id, App Registration Client Secret value.
- AWS
- For step by step, please review: AWS Detailed Steps for User Credential Generation
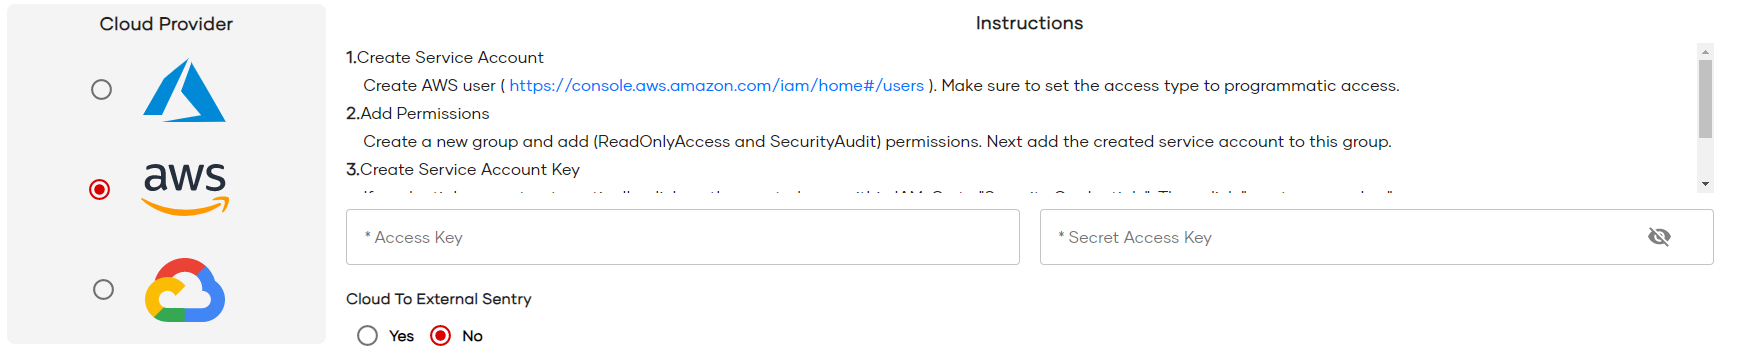
- Create Service Account
- Create AWS user (https://console.aws.amazon.com/iam/home#/users). Make sure to set the access type to programmatic access.
- Add Permissions
- Create a new group and add (ReadOnlyAccess and SecurityAudit) permissions. Next add the created service account to this group.
- Create Service Account Key
- If credentials are not automatically created in previous step, click on the created user within IAM. Go to "Security Credentials". Then click "create access key".
- Add key to platform
- Copy the contents of Access Key and Secret Access Key in the corresponding input boxes in the form.
- Copy the contents of Access Key and Secret Access Key in the corresponding input boxes in the form.
- GCP
- For step by step, please review: GCP For step by step, please review:
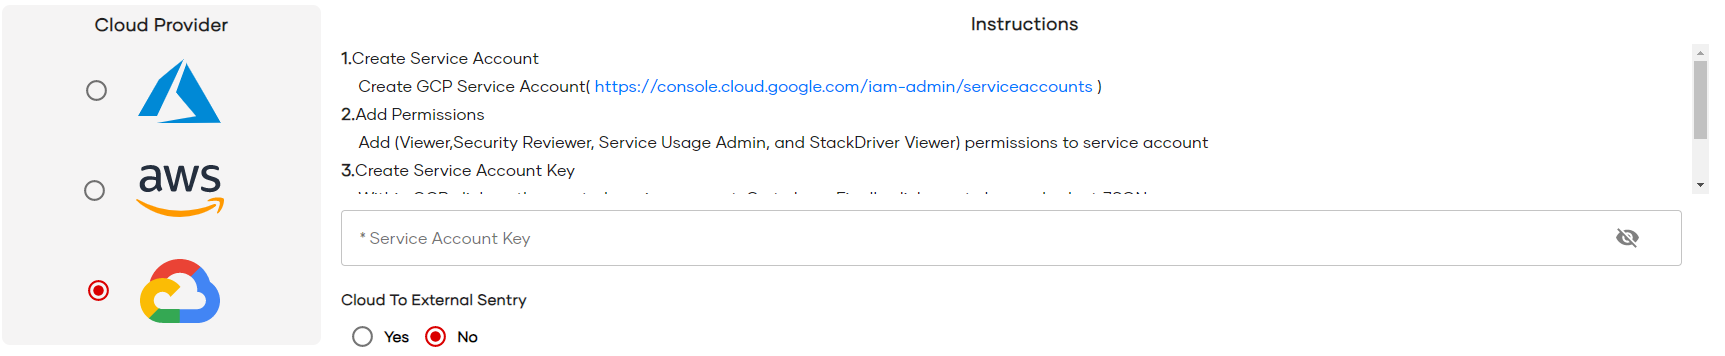
- Create Service Account
- In GCP Console, go to IAM, and create a new Service Account( https://console.cloud.google.com/iam-admin/serviceaccounts ), With the following permissions: Viewer,Security Reviewer, Service Usage Admin, and StackDriver Accounts Viewer.
- Create Key
- From the Service Accounts, select the newly created Service Account, and select the Keys tab. Then in add Add Key, select Create new key, with type JSON, it is going to be downloaded automatically. Open the dowloaded file with a text editor, and copy the entire key (all the text in the file, including the curly brackets {}).
- Add key to platform
- Copy the contents on the service account key, and paste it into the credentials input area.
- Copy the contents on the service account key, and paste it into the credentials input area.
- Azure
- Next configure the frequency of your scans.
- Manual: If a sentry is configured to manual scanning you will have to manually press the scan button to initiate a scan.
- Scheduled: when setting scheduled scans periodicity can be set so scans can be automatically started every 3 days at 15:00, every 3 weeks on Tuesdays at 00:00 and so on.
- Continuous: to scan your environment 24/7 365.
.png)
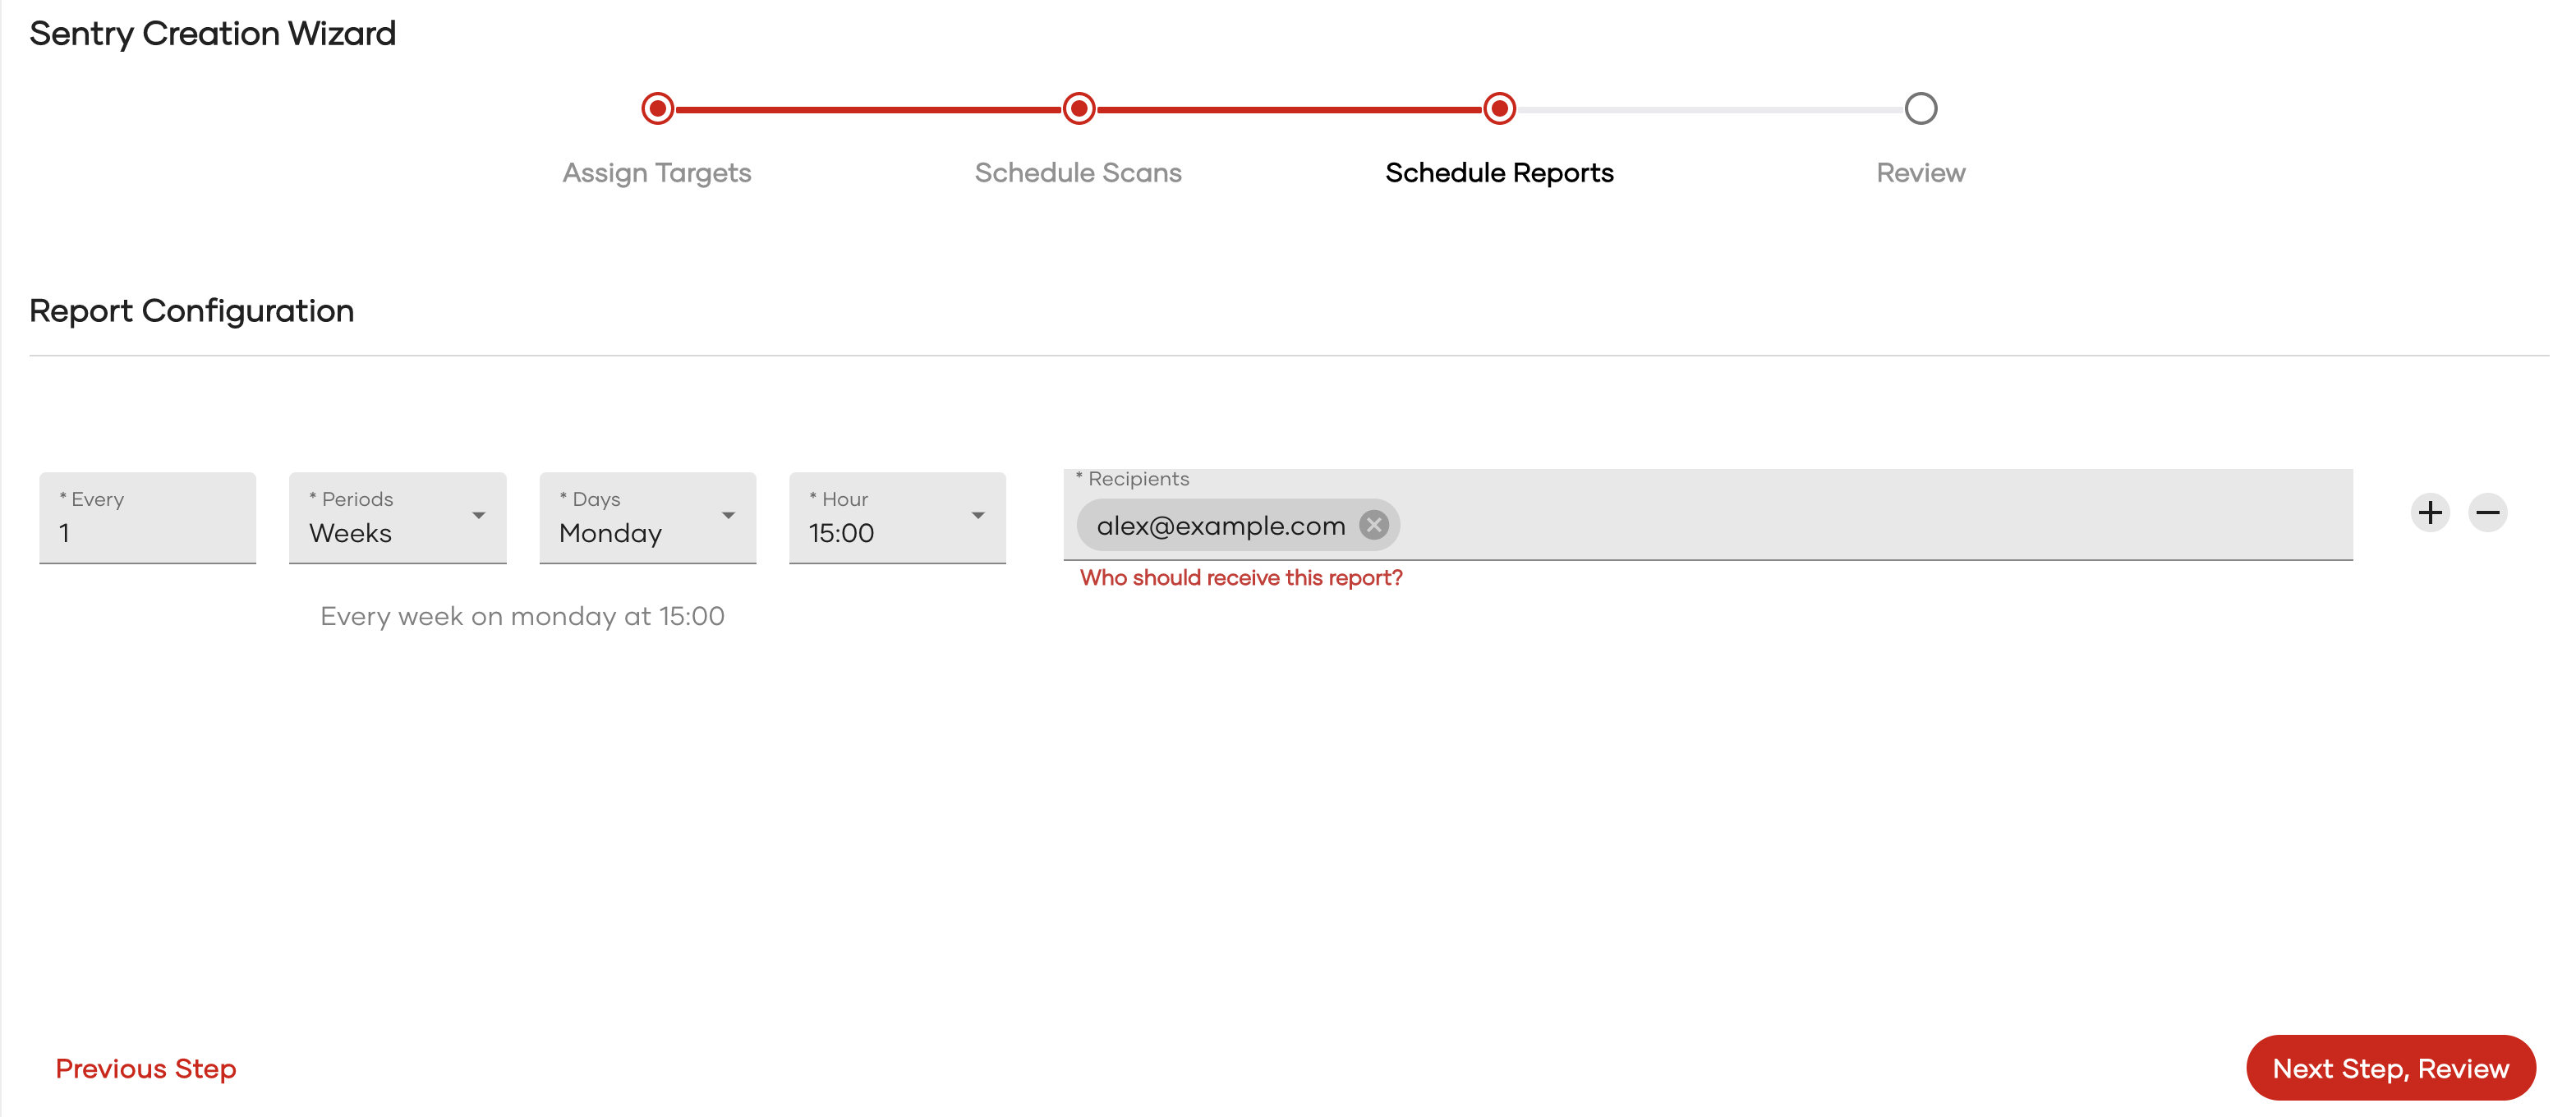
- The next step involves the scheduling of reports. If configured, RedSentry is going to delivery reports automatically, based on choosen schedule, following the same approach format than the scheduled scan (every 3 days at 15:00, every 3 weeks on Tuesdays at 00:00 and so on). If automatic report delivery is configured, it is needed to provide at least one email per schedule for the report to be sent to.
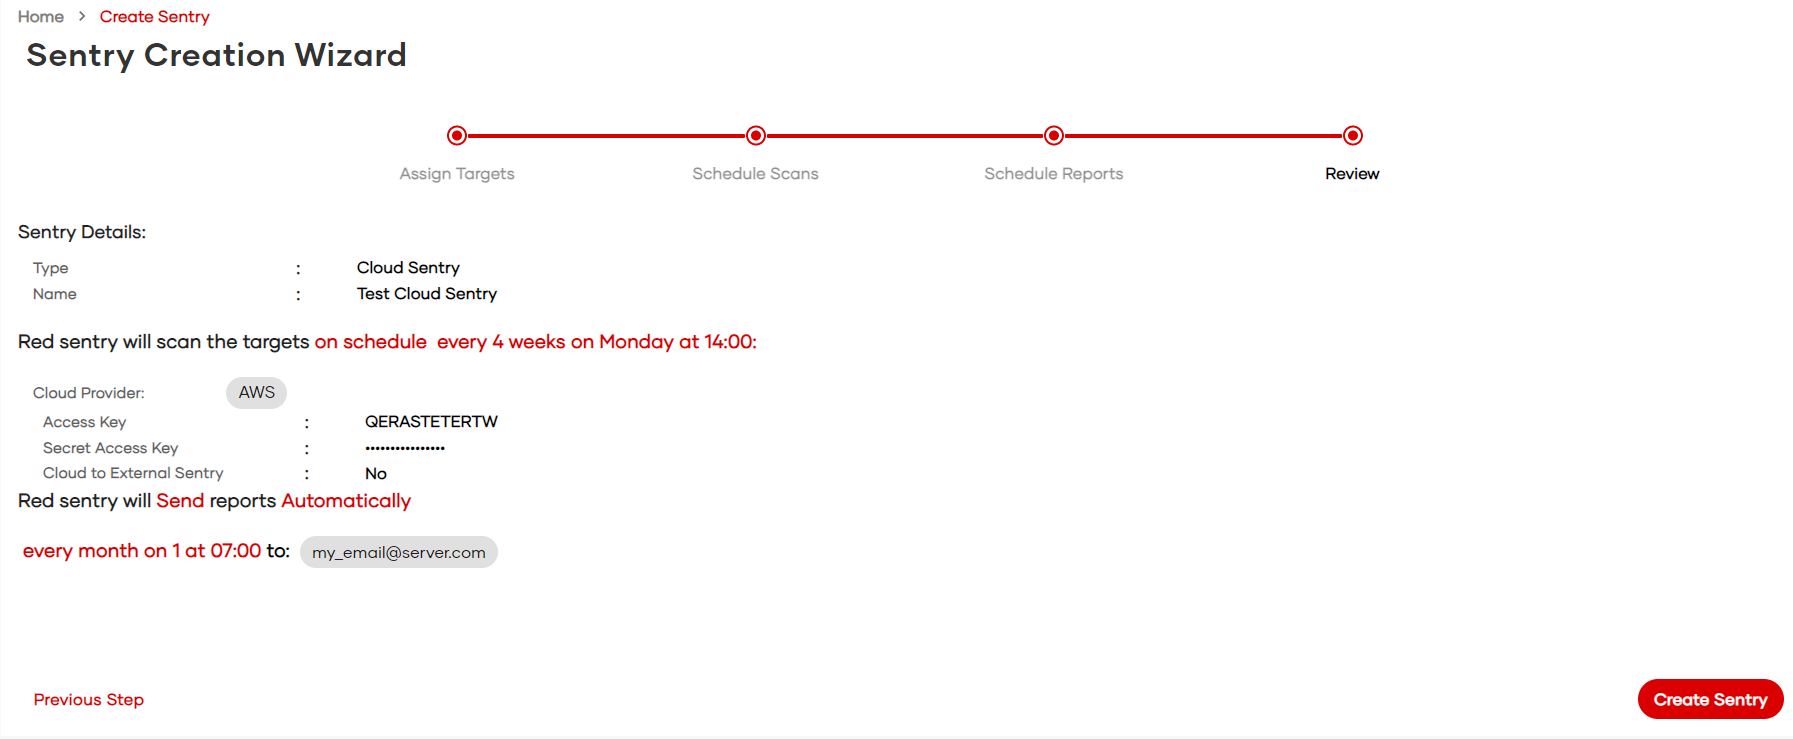
- The last step is the Review. Here the configuration details of the sentry can be reviewed. In case anything needs to be changed it is possible to either press the "Previous Step" button to go back one step at a time, or click the desired step in the steps bar at the top
- If everything is ok, then clicking in "Create Sentry" will create the Sentry and navigate to Sentry List screen.
Was this article helpful?